DIY build guide

Build Your Own Solar-Powered Battery

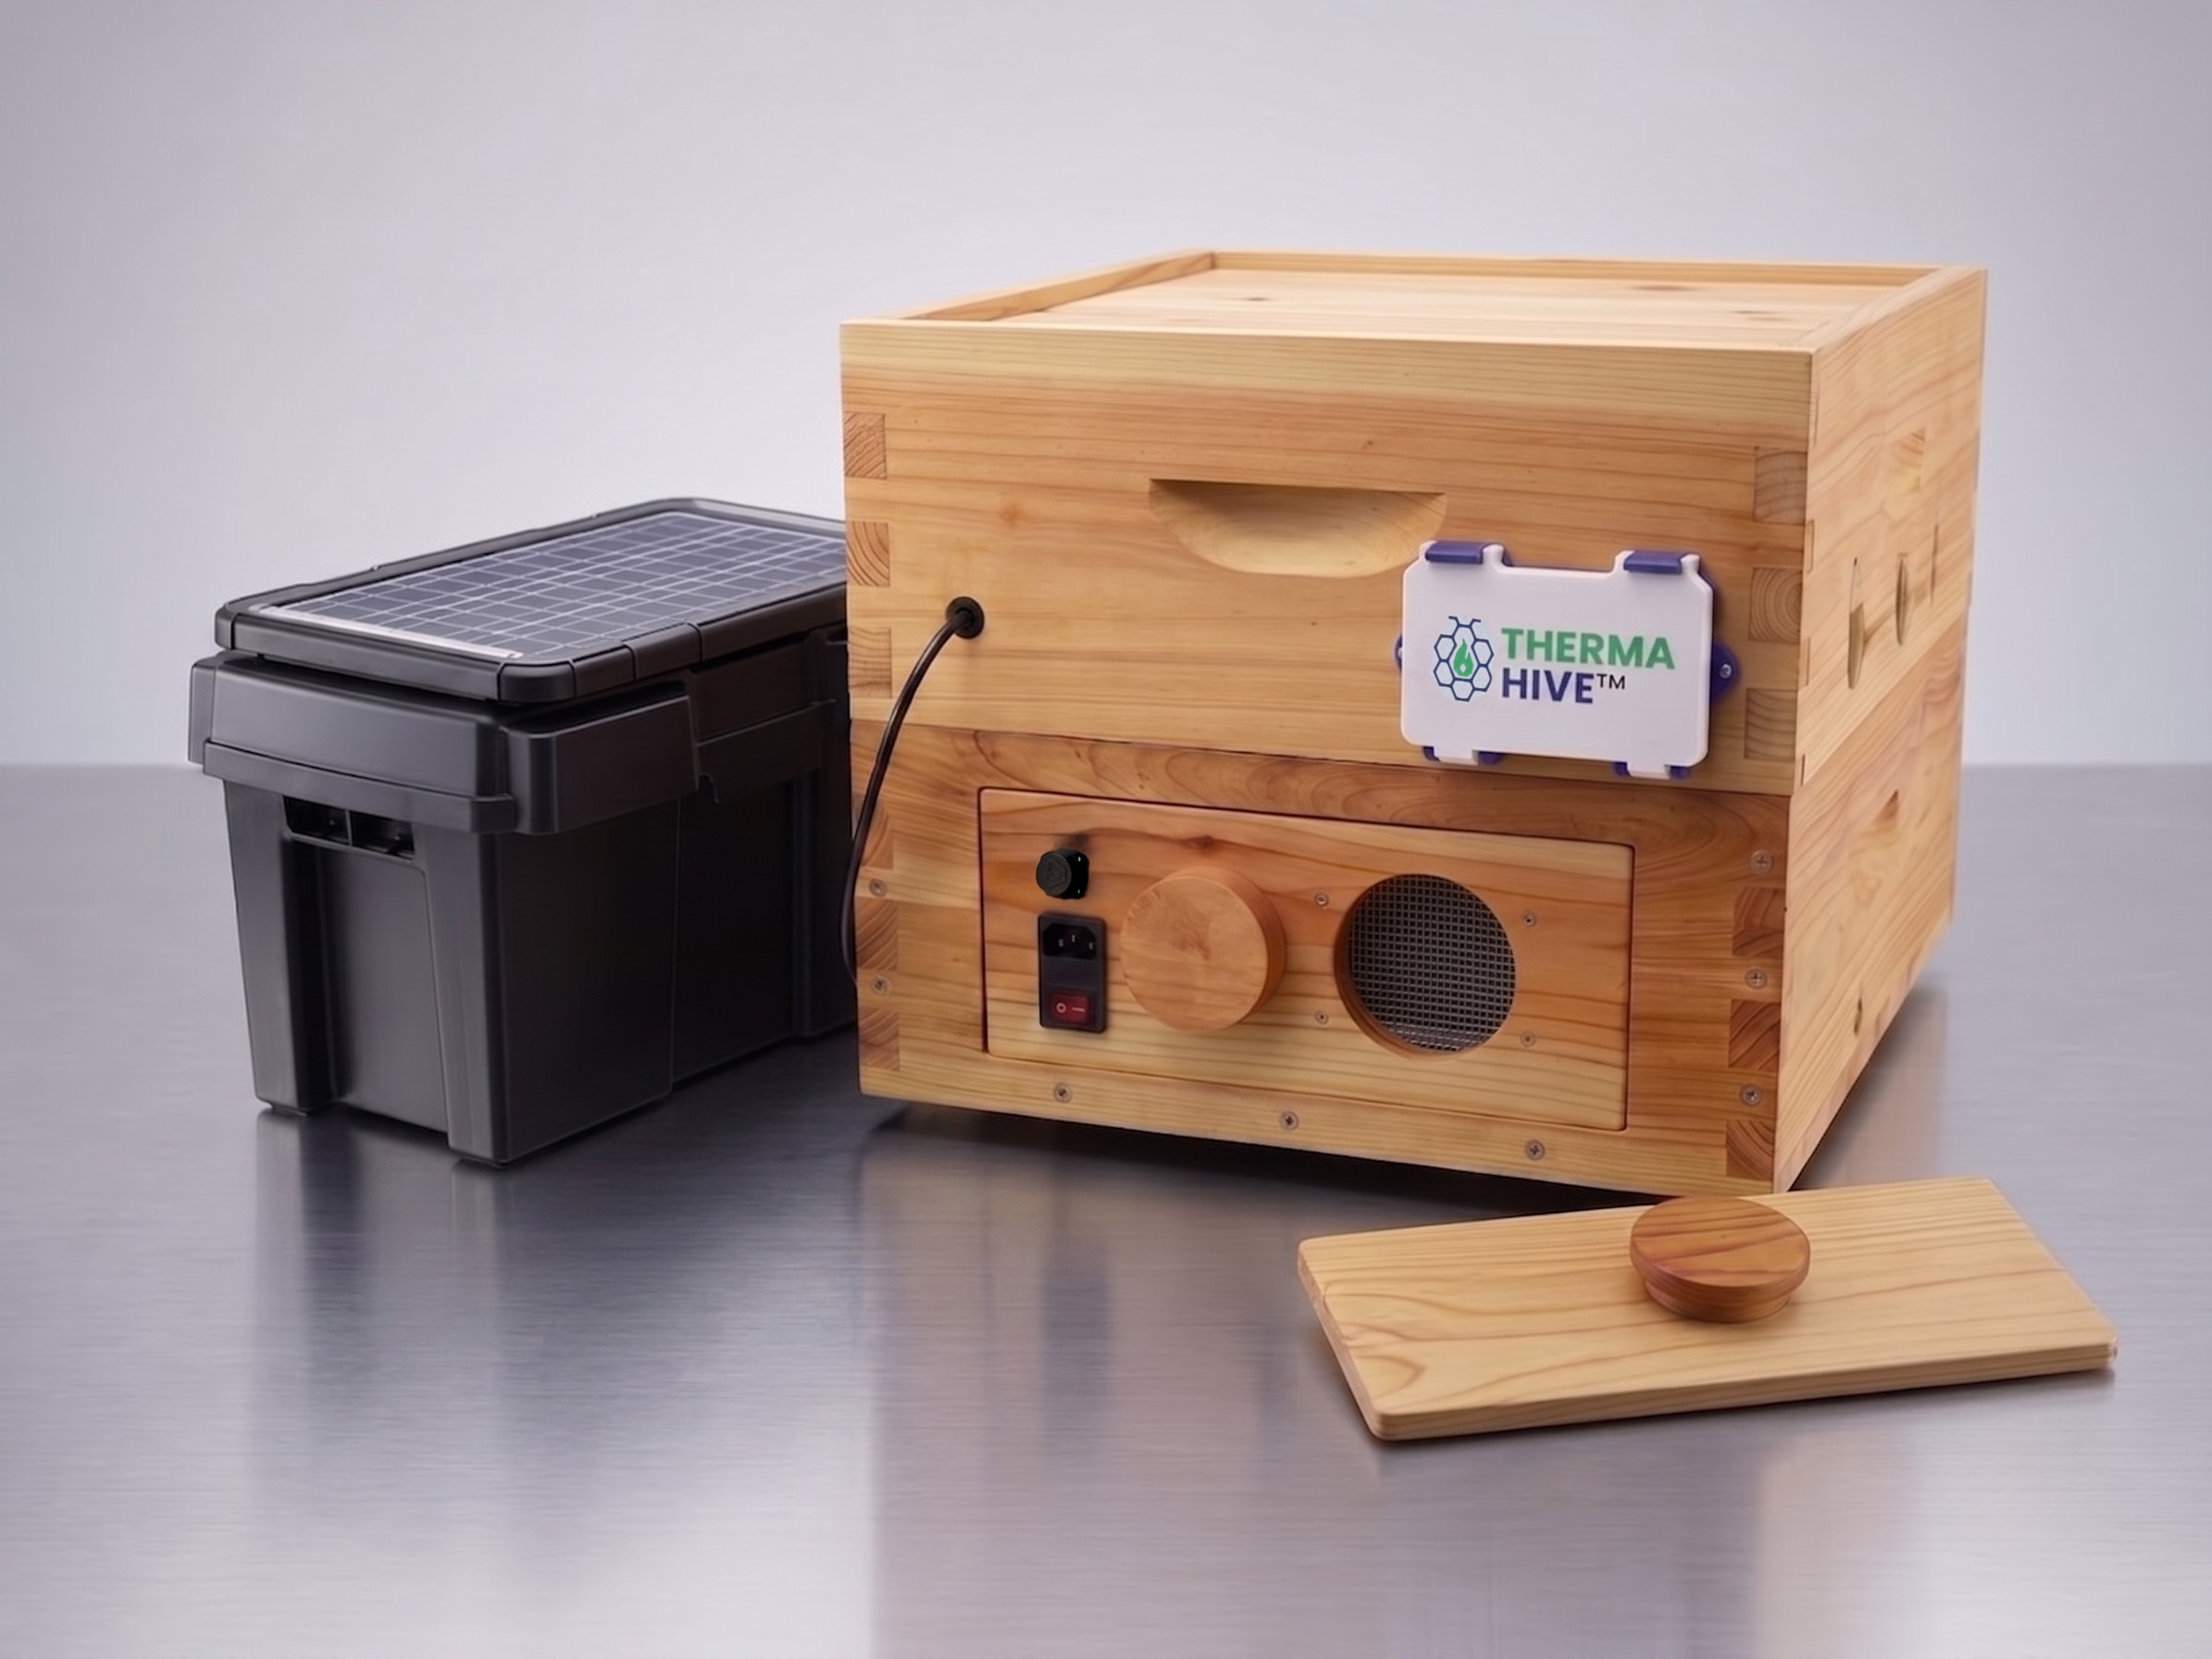
Want to run your ThermaHive controller off-grid? You can build a rechargeable, solar-powered battery pack for under $300 (before tax) using parts from any hardware, marine, or auto supply store. No specific brand matters here — just match these specs.

A weatherproof battery box with a mounted solar panel on its lid, built as a solar-powered battery pack for a ThermaHive unit.
Real-world numbers

Battery Runtime by Mode

Based on real energy-log testing, here’s how long a full charge lasts depending on what the unit is doing.

ModeMeasured Power DrawEstimated Runtime*
Monitoring only (no fan, no heat)~0.9 W~47–48 days
Ventilation (fan running, no heat)~2.9 W~14–15 days
Full treatment~178 W avg / 657 W peak620 Wh per treatment

*Based on the battery’s ~1,000–1,024 Wh usable capacity after depth-of-discharge and efficiency losses, and on our own internal testing. Actual runtime can vary with fan speed, ambient conditions, and individual battery/inverter performance.

In practice, this means the battery can sit monitoring hive temperature for well over a month, or run in ventilation mode for roughly two weeks straight, before it needs a recharge — on top of having enough capacity for a full treatment whenever one’s needed.

Parts list

What You Need

Prices below reflect what these items were listed at when this page was written and are subject to change — check current pricing before you buy.

1. 12V LiFePO4 Deep-Cycle Battery — 100Ah, ~1280Wh, built-in BMS

This is the core power source. Look for a lithium iron phosphate (LiFePO4) battery with an integrated battery management system (BMS), rated for 10+ years or 15,000+ charge cycles.

Estimated cost: $150–195

Suggested option: amazon.com/dp/B0FN3TVVD8

Other options: amazon.com/dp/B0FX2W9GCC (~$152) · amazon.com/dp/B09L89LW3P (~$195)

2. Battery Box

Any vented, weatherproof box works — it just needs to physically fit your battery. Group size is a fine starting point, but check actual dimensions too: lithium batteries don’t always match the same group-size box as their lead-acid equivalent, so a box labeled for one group size may still be the right fit. If you want the inverter to live inside the box alongside the battery, size up — we used a Group 31 box to leave room for both.

Estimated cost: $11–25 (Group 27, battery only) · ~$85 (Group 24/27/31, fits battery + inverter)

Suggested option (battery only): amazon.com/dp/B0CSTDTGWK

Suggested option (battery + inverter): amazon.com/dp/B0CLNVCKTN

Other options: amazon.com/dp/B000Y82MHW (~$11) · amazon.com/dp/B001O0D6QK (~$25)

4. Power Inverter — 12V DC to 110/120V AC, 1000W continuous / 2000W peak

Converts battery power to standard AC so you can plug your ThermaHive controller straight in. A modified sine wave inverter is sufficient.

Estimated cost: $50–55 (modified sine wave, like the suggested option below)

Suggested option: amazon.com/dp/B0F3TLFXHR

Pricier upgrade (pure sine wave — cleaner power output): amazon.com/dp/B0DCJHY3TH (~$100) · amazon.com/dp/B07JMQ27WJ (~$127)

5. Inline Fuses + Holders

You’ll need two: a fuse holder sized to your inverter’s rated draw (commonly a 100A ANL or MEGA fuse for a 1000W inverter — check the inverter’s manual for the exact rating), and a smaller 15–20A blade-style fuse for the solar charge controller circuit. Don’t share one fuse between them — the solar controller’s wiring is much thinner and needs its own, smaller fuse.

Estimated cost: $25–30 for both (both linked options below are small kits with spare fuses included)

Suggested option (inverter fuse): amazon.com/dp/B0CKR28Y2M

Suggested option (solar controller fuse): amazon.com/dp/B0B24YYYCF

Total: roughly $296 using the suggested options above Just under $300 before tax, with the battery-only box (inverter mounted separately). There’s not much room left in that budget, so shop carefully if you want to stay under $300. Swapping in the larger box to house the inverter alongside the battery adds about $70 on top.
Assembly

How to Build It

A full video build guide is coming soon — in the meantime, here’s the basic assembly.

A full video build guide is coming soon. In the meantime, here’s the basic assembly:
1

Fit the battery in the box

Set the battery inside the battery box so the terminals are accessible, and secure the lid. If you’re using a Group 31 box, there’s room to mount the inverter inside next to the battery too — otherwise, mount the inverter just outside the box.

2

Add an inline fuse for the inverter

Run a fuse between the battery’s positive terminal and the inverter’s positive lead, sized to the inverter’s rated input draw (check the inverter’s manual — this protects the battery and wiring if something shorts). Mount the fuse holder as close to the battery as possible.

3

Connect the inverter

Attach the inverter’s DC input leads to the battery — positive lead through the fuse holder you just installed, negative straight to the battery’s negative terminal. Double-check polarity before powering anything on.

4

Mount the solar panel

Mount it somewhere it will get consistent, direct sunlight throughout the day.

5

Add a separate fuse for the solar charge controller

Don’t share the inverter’s fuse — its wiring is much thinner and a fuse sized for the inverter won’t protect it. A 15–20A inline fuse on its own positive lead is plenty for a small MPPT setup like this.

6

Connect the solar charge controller

Wire the MPPT controller’s battery leads to the battery terminals first (through the fuse from the previous step), then connect the mounted panel’s leads to the controller’s panel input last. Double-check polarity here too — connecting the panel before the battery, or reversing the leads, can damage the controller.

7

Test before your first treatment

Confirm the MPPT controller shows an active charge when the panel is in sunlight, and confirm the inverter powers on and outputs the correct AC voltage.

8

Power your ThermaHive unit

Plug the controller’s power cord into the inverter’s AC outlet just like you would a wall outlet.

9

Between treatments

Leave the solar panel connected and in the sun so the battery recharges — about 3 weeks under ideal conditions.

Safety notes: always connect and disconnect in a de-energized state, double-check polarity before every connection, keep the battery box ventilated, and never exceed the battery’s rated discharge current. If you ever need to disconnect the solar setup, reverse the order — panel first, then battery.

Tested, not estimated

How It Performs

These numbers aren’t estimates — they’re based on real energy-log testing during ThermaHive treatments.

620 Wh Per full treatment cycle
657 W Peak draw at 112°F
~3 weeks Full solar recharge time

A full treatment cycle (roughly 3.4 hours, with a thermal mass load comparable to an occupied hive) drew about 620 Wh, and a separate test measured a peak draw of roughly 657 W during a 112°F treatment.

After accounting for battery depth-of-discharge and normal battery/inverter efficiency losses, this 1,280Wh battery provides around 1,000–1,024 Wh of usable capacity — enough for a full treatment with plenty to spare. The 1,000W inverter is sized with margin above that measured 657W peak load for a safety buffer.

Under ideal conditions — consistent, direct sunlight — the battery takes about 3 weeks to fully recharge via the solar panel. ThermaHive treatments are generally spaced about 4 weeks apart, so the solar charger keeps pace with normal treatment scheduling.

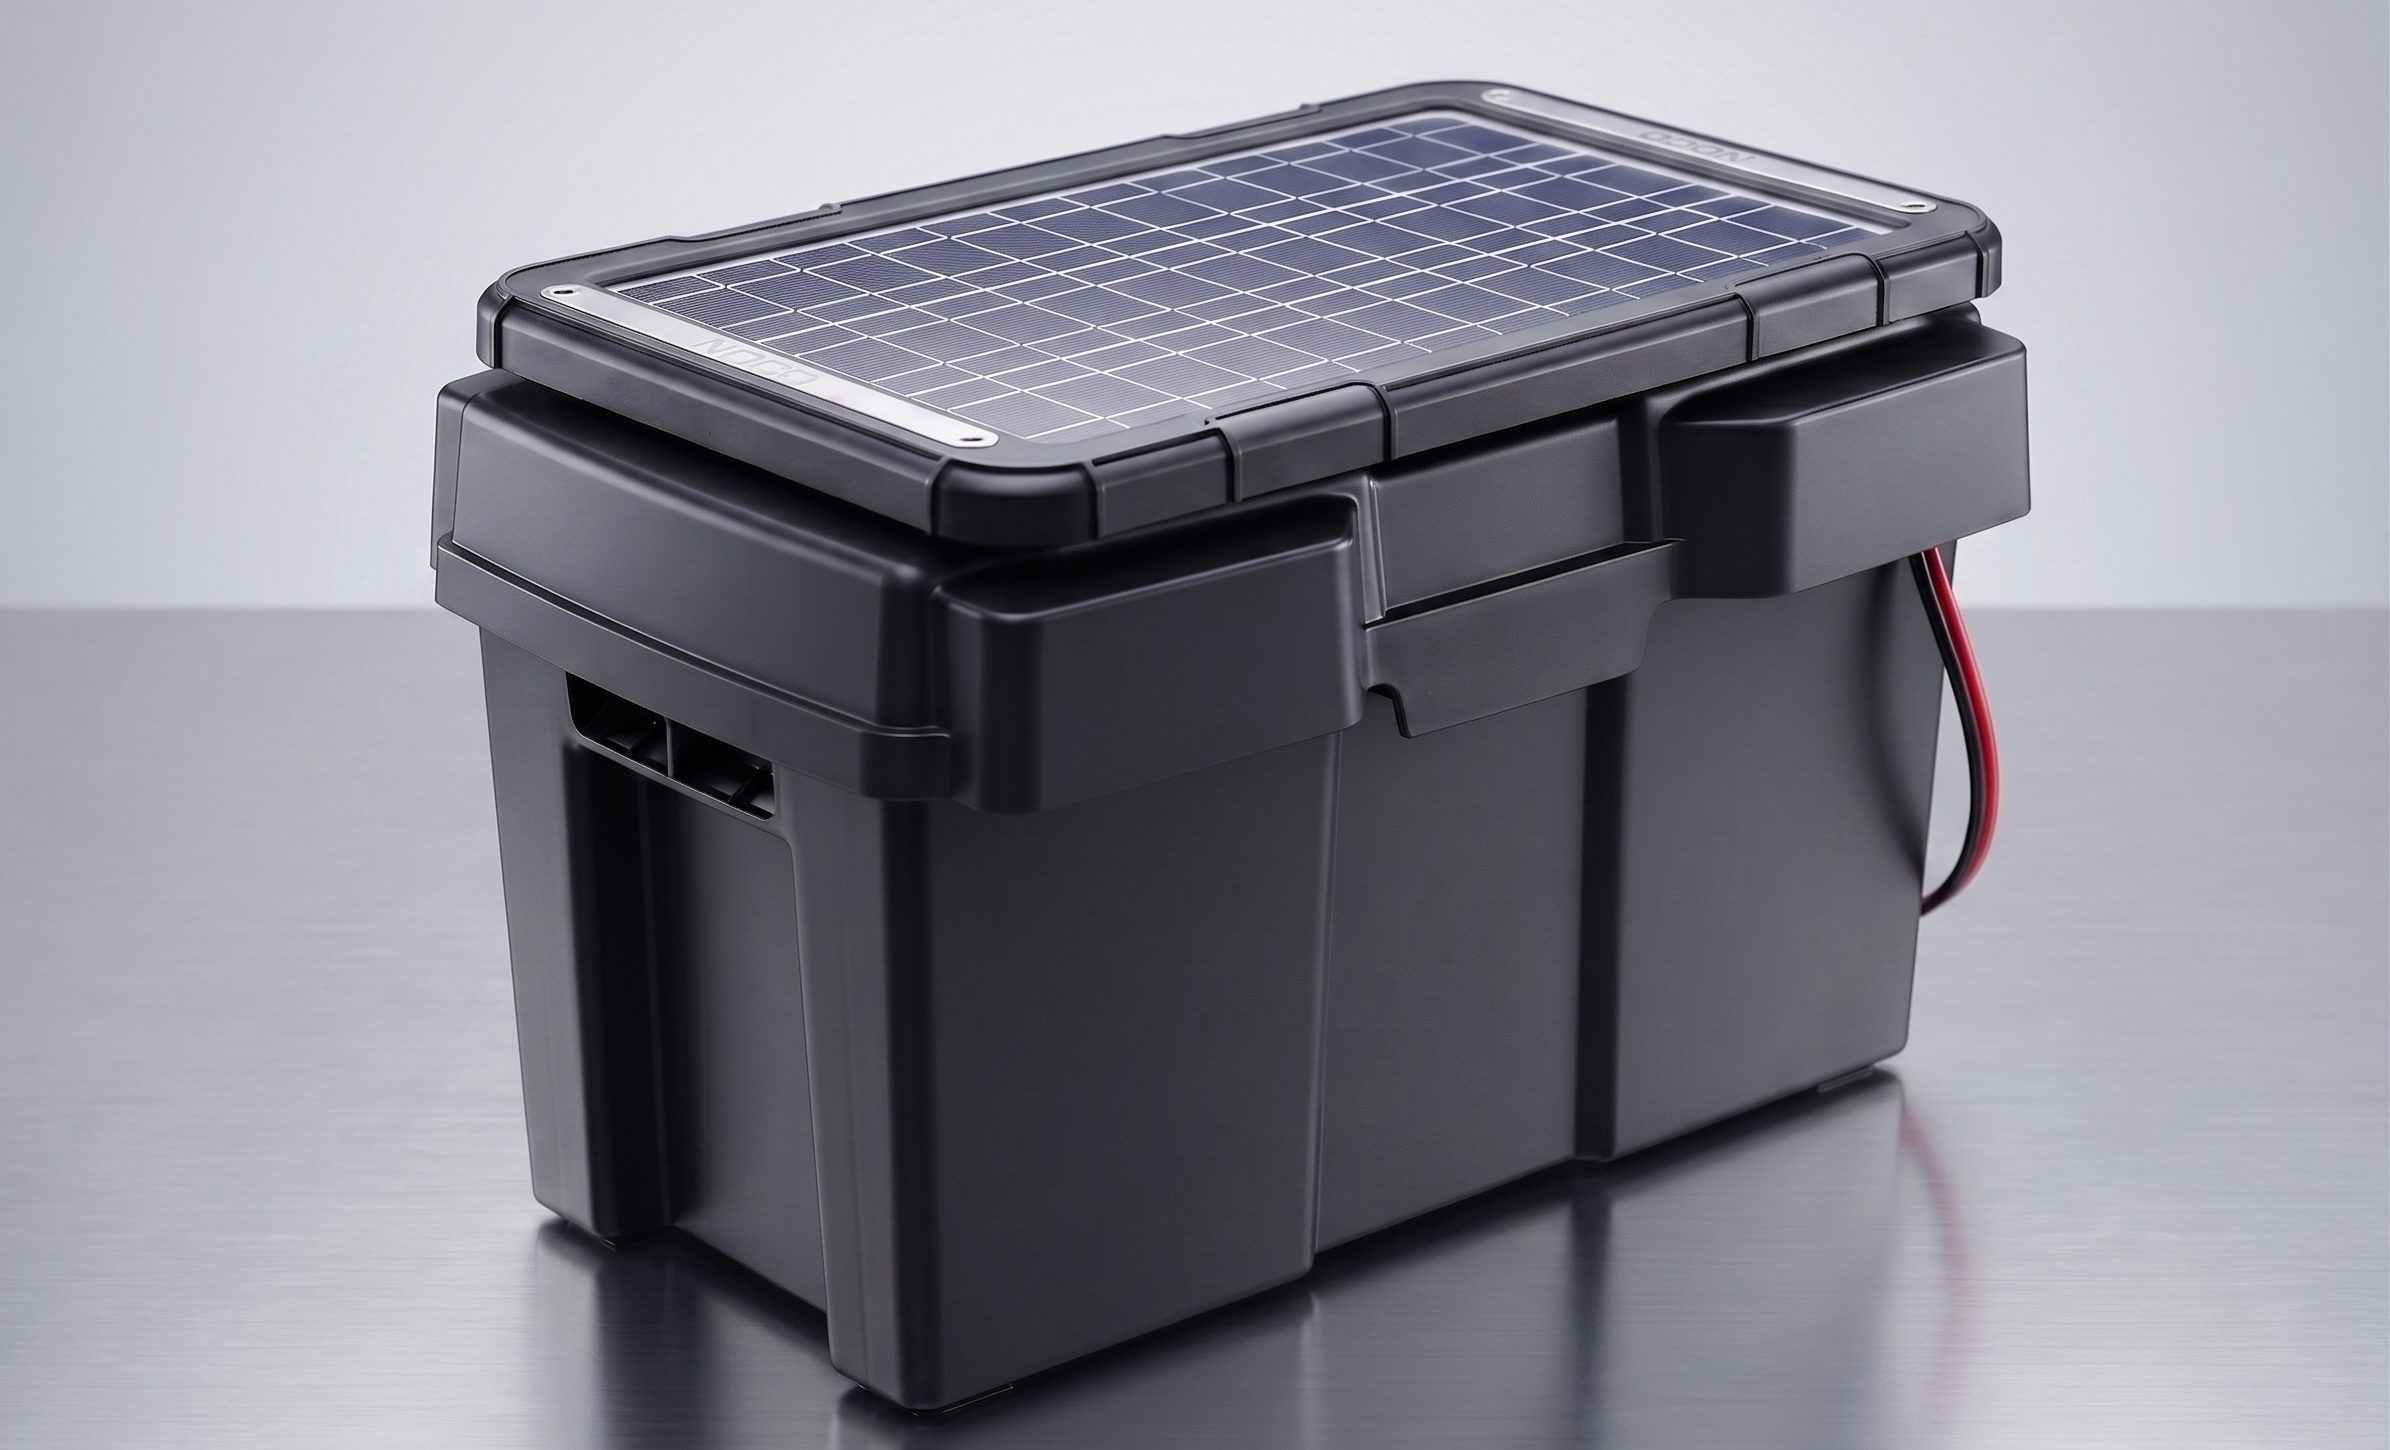
The finished solar-powered battery build: a weatherproof battery box with battery, inverter, and mounted solar panel.

Disclaimer: this timeline assumes mite counts stay in the normal range. Higher mite loads can require repeated treatments to bring counts back down, which may mean charging more frequently or keeping a backup battery on hand.

Want the full build guide?

Download the printable PDF with the complete parts list, cost breakdown, assembly steps, and safety notes for building your own solar-powered battery pack.